[Full disclosure: I posted this guide in August 2013. As of January 2014, I have started working for Hutch Games, partly because I loved this game so much. I’m not working on Smash Cops Heat, but I feel I should explicitly state that I’m leaving this post exactly as I originally wrote it.]
I also reviewed Smash Cops Heat here.
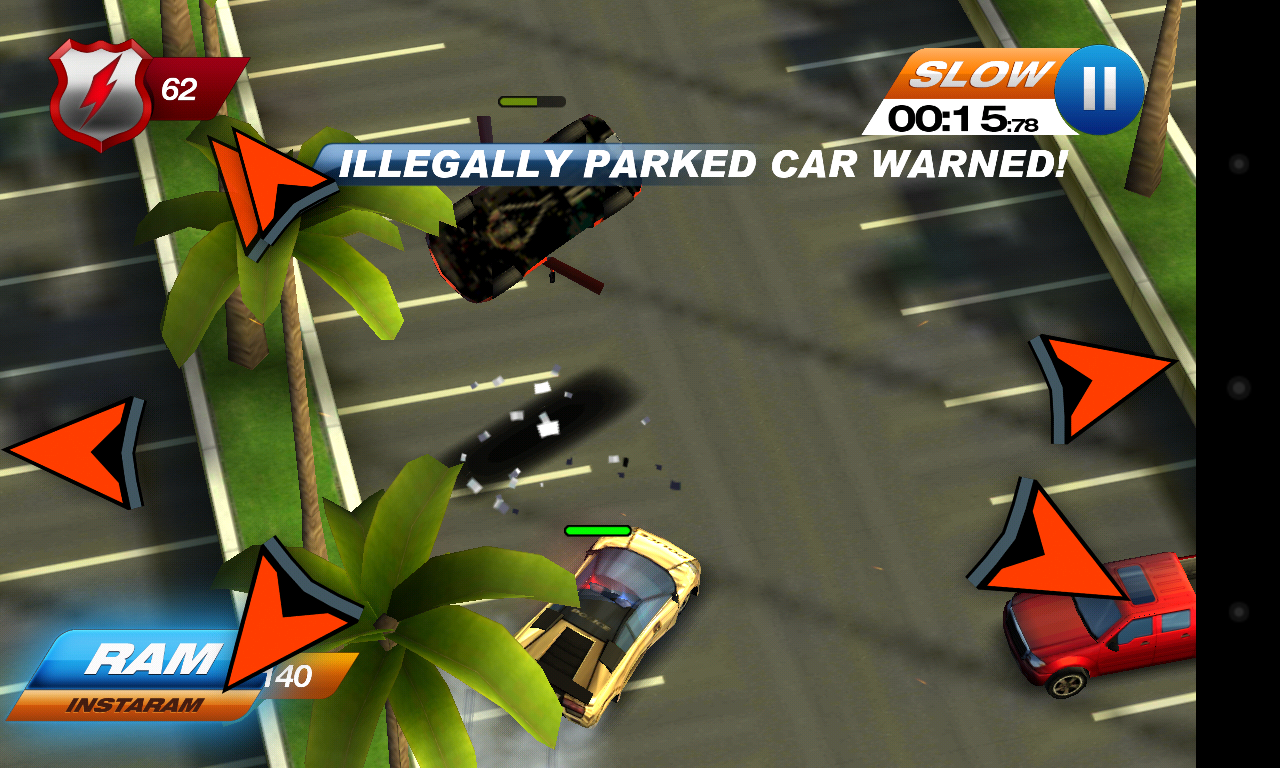
Smash Cops Heat can get quite tricky in the later stages of the game, and getting 150/150 stars is especially challenging. I didn’t see any advice online for the later stages of the game, so now I’ve achieved 150/150 stars I figured it would be worth sharing my tips and level strategies for anyone out there that’s having trouble!
First, one big caveat: Hutch are evidently improving and tweaking the game quite often. Over three months, I’m pretty sure the duration of a Supercop changed twice (and the power of an Instaram probably changed as well). As such, the precise number of power-ups you need to use may well differ from those I list below, depending on which version you have. Also, of course, it’s entirely possible you’ll be more skilled than me, in which case you won’t need as many!
Difficulty curve: the three phases
My playthrough experience of Smash Cops Heat had three very distinct phases, with the difficulty curve changing quite steeply with each one. These were as follows:
- Progress all the way up to ~119 stars (out of a total of 30 levels x 5 stars = 150) was steady and smooth, with no need for Instarams or Supercops
- Getting from 119 to 135 stars (to unlock the Guardian) was much harder, requiring strategic use of Instarams and Supercops on some levels and/or a lot of focus on learning felon routes
- The Guardian enables you to relatively easily ‘complete’ the game, getting at least 1 star on each level. At that point, the game points out you should really try to get5 stars on every level. If you want to achieve this, you’ll find the difficulty level escalates again, requiring more Instarams and Supercops, a lot of route learning, and a deeper understanding of exactly how the game calculates damage.
Even for the final stage, I got by using only the Instarams and Supercops given for free once a day. Someone less patient than me might prefer to buy them though, as my complete playthrough took about 2 months playing a little each day, and I practiced some of the later levels extensively to find out the smallest number of power-ups possible. Alternatively, someone more skilled than me might need fewer of these power-ups to begin with!
Guide and Tips
There are two things that can help you out if you’re struggling with the game: specific strategies for levels, and general tactics or tips about game mechanics. Figuring these out is a big part of the fun though, so to reduce the potential for spoilers, I’ll list both level guides and general tips in the order I needed to discover them. That way, if you’re stuck, you’ll hopefully find the one bit of advice you need by working your way down this post.
Phase 1: The quest for the Reaper
Getting the first ~119 stars and unlocking the Reaper (by collecting 20 donuts) is the first and easiest phase of the playthrough. I didn’t find I needed to use Instarams or Supercops, although they could have saved me some time on a few of the more challenging levels. That said, there’s still a few useful things to figure out on this part of the journey.
Tip #1: You don’t need to use a RAM to cause a Smash
The game heavily encourages you to damage the felons by ramming them from the side or front, which results in a satisfying slow-mo ‘Smash’. This is indeed a great way to deal damage while sustaining relatively little yourself.
However, it’s not the only way. In levels with time pressure, it’s useful to know you can also create a Smash by colliding with the felon front or side with a high closing speed – most easily, by getting in front of them and then turning around to collide head-on. In a level with a whole series of felons in a row, if you can get ahead of the pack, you can Smash each one sequentially as they attempt to drive past you. The slow-mo generated by a Smash helps you manoeuvre to pull this off.
Tip #2: Focus on the end of level report
To get a full 5 stars for a level, you need to achieve a gold ranking for time, health, and suspects arrested (with one notable exception that I’ll get to later). By paying attention to this report, you can get an idea of how to improve your strategy to get the full 5 stars. If you’re really struggling, you might have to figure out the exact criteria for achieving gold by trial and error, so you know just how much you can compromise on the easiest criteria in order to achieve the hardest. For the levels I struggled with, I list below what I was able to work out about the exact criteria needed. Do note, though, that these might also change with future updates of the game.
Tip #3: Get the donuts
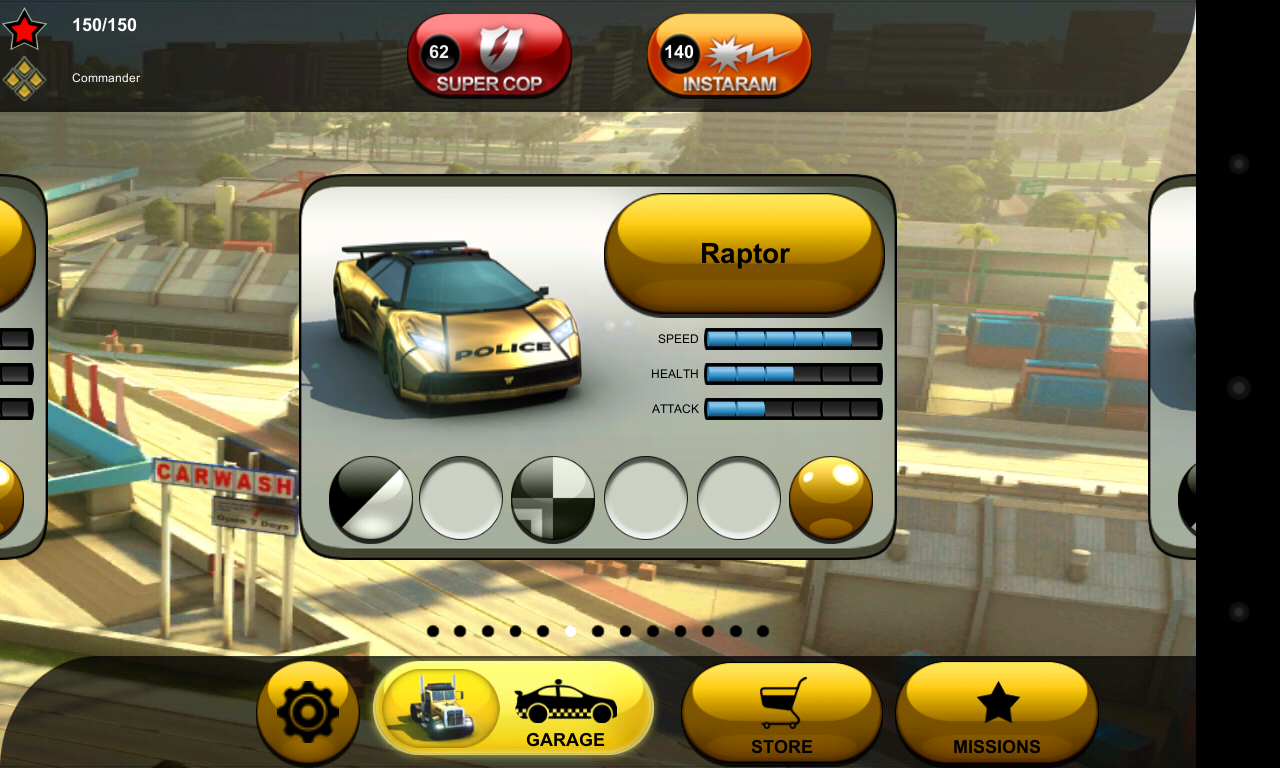
For me, the balance of skill required vs vehicle unlocked played out perfectly until around 110 stars. By this point I had the incredibly fast Raptor (unlocked at 105 stars), but was really struggling to get the additional stars to unlock the Sabre (unlocked at 120 stars). Then, even with the Sabre, it becomes extremely hard to get the additional 15 stars needed to unlock the mighty Guardian.
I assume this was deliberate, because this is exactly where the Reaper comes in. Unlike any other vehicle, you can get the Reaper once you’ve got 20 donuts. The Reaper is very fast and strong, but has a huge tendency to drift – which actually makes it a lot of fun to master. I didn’t get anywhere with the Sabre at all – I used the Reaper pretty much all the way in order to unlock the Guardian. So, collect those donuts and unlock the Reaper as soon as you can!
Tip #4: Donut strategies
Of course, you have to find the donut pieces first. Although the potential for going off-route is high, I found the donuts were only ever just off the path you would naturally follow to complete the level, and in the majority of cases can be spotted just by keeping your eyes peeled.
Each level holds 3 donut pieces. The good news is that if you find any piece and then successfully complete the level, that piece will be locked and you’ll never have to pick it up again. The bad news is you do have to actually complete the level, and in some cases this is pretty tough (especially level 20). For those levels, you have to focus on picking up one donut piece in any given playthrough, and you might even want to use a Supercop to help you take the diversion necessary and still qualify (although I didn’t find this was necessary for any of the levels, even the later ones).
Once you have the Reaper, it’s not too hard to reach ~119 stars without using any power ups.
Phase 2: The quest for the Guardian
Pushing through to 135 stars is quite tough. I found that where before I could complete a few levels and net 5-15 stars per playing session (of about 10-20 minutes), at this stage it became more like just 1-3. There were a few levels where this took some extra effort, so I’ll list my tips for those here.
By the way, if you’ve enjoyed the game so far, this would be a good point to show your appreciation by buying a different skin for the cars! That’s what I did, anyway, and I appreciated the variety it added to the experience.
Level 20: Transfer high profile prisoner across town
Once you have the Reaper, this isn’t too bad – the important thing to note is that you’ll need to take out 3 suspects along the way to get the full 5 stars.
Level 22: Pursue and arrest the two stolen security trucks
This was the first level I encountered where it was really tough to get gold for all 3 criteria. Based on the best I did when getting silver, and the worst I did when getting gold, achieving gold needs the following:
Time: Between 1’33” and 1’35”
Health: Between 72 and 80
Felons: You have to get both the security trucks and the green vehicle!
What makes this particularly hard is that the location of the green vehicle isn’t indicated with an arrow. It’s also quite tough to eliminate all three felons without sustaining too much damage yourself. In the end, I found that using the Reaper I needed one Instaram to take out the green vehicle, and simple route memorisation was enough to do the rest.
Level 23: Pursue and arrest the three mafia suspects
Despite initially seeming difficult, I ultimately found I could complete this level using the Reaper without any power ups – it just took a lot more route-learning and practice than earlier levels. Criteria for gold are:
Time: At least within 37″
Health: Between 81 and 76
Felons: All 3
The most important strategy to use was the one I mentioned earlier – getting ahead of all three felons, then turning around, ramming the first, and then just colliding into the next two as they drive towards you. While they’re all recovering, you have enough time to turn around and get ahead (provided you know the route they’re going to take) in order to repeat the manoeuvre when your RAM recharges.
Level 24: Collect all the evidence in time and take out suspects
This is tough because you have to be quick, but also take down 5 suspects while sustaining very little damage yourself. After trying a few different strategies, it seemed to me the only way was to make use of two supercop powerups.
Criteria for gold are:
Time: Between 1’11” and 1’12”
Health: Between 72 and 78
Felons: 5
Fortunately, the gang of felons is ready to set upon you right at the start. I used the Reaper, and I started by using a couple of Supercops to take out the requisite 5 felons immediately (making sure to count them carefully), then set off to collect all the evidence in a roughly circular route, starting with the piece that’s immediately towards the right from the starting position.
This is still quite tough to pull off, so I practiced quite a bit first: taking out the felons without any Supercops, and speed-running the route a few times. This way I could make sure those Supercops weren’t wasted when I did deploy them. Even then I only got it on my fifth try, so burned through 10 Supercops in total.
Level 26: Pursue and arrest the two chop shop suspects
The speed and route taken by the felons make this level a bit of a challenge. I used the Reaper, and once I learned the route, I still needed one Instaram to make all the gold criteria, which are as follows:
Time: Between 1’02” and 1’17”
Health: 81 was sufficient
Felons: 2
Beyond standard route learning, this one required a bit more planning and figuring out shortcuts to get ahead of the felons. For example, at the start, I didn’t follow the suspects down the alley they turn left into but instead went straight on to take the next left and intercept them both as they emerge. This same trick can then be repeated along their route. Even then, as I mentioned above, it took one Instaram to make sure I took them out in time and without sustaining too much damage myself.
Tip #5: Damage calculation
To progress beyond this point, it’s really useful to know a bit more about how damage is calculated in the game so you can apply it for maximum advantage.
I studied physics, so at the back of my mind I had this idea that in a collision, the closing speed of the two vehicles was the most important factor, and they would both encounter a roughly equal force that would cause about equal damage to each. Granted, there will be differences based on the exact point of collision and the structure of the two cars – one car driving into the side of another will probably fare better, for example – but in general both should take some damage, a bit like this:
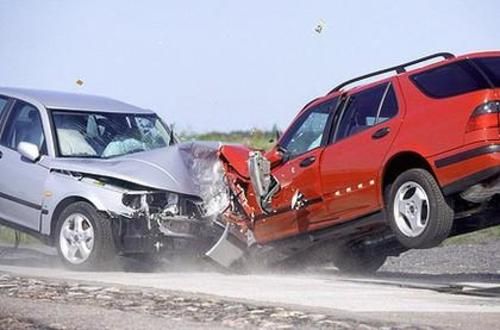
In practice, that’s clearly not the case in Smash Cops Heat. The game explicitly lists tiered levels of ‘ATTACK’ and ‘HEALTH’ as characteristics that vehicles possess, so we could assume a vehicle with a high Attack crashing into one with low health will deal out a significant percentage of damage while taking relatively little itself – but experimenting in the game suggests there’s actually more to it than that.
From what I can tell, in any collision there are separate damage calculations for each vehicle. You as the cop will damage the felonious vehicle in proportion to your absolute speed towards it at the moment of impact. This impact will be boosted if your vehicle has a high attack stat, and will do a higher percentage of damage to the felon if they have a lower health stat.
Meanwhile, the same logic applies in reverse. Your vehicle will suffer damage in proportion to the speed of the felon towards you, again boosted by their attack and your health stats.
What this means in practice
This is particularly important in levels where you have to take out a large number of tough felons while sustaining very little damage yourself. In particular, if you Ram a tough felon head-on, while they are driving at full speed towards you, you will take noticeable damage. Over the course of the level, this can add up and easily put you below the ~80 or so health you’ll need to get gold.
So in those kind of levels, you’ll need to focus on ramming felons when they have a relatively slow speed coming towards you. This is most easily done when they’re turning a corner, but it’s also very advantageous to ram them while they are briefly stationary immediately after righting themselves after a successful smash. While this is very unlikely to cause another smash, it should still do a good deal of damage while you suffer none yourself, and is especially useful if time constraints are tight.
Level 27: Pursue and arrest the four race drivers
This is pretty much the definitive level for the strategy of getting ahead of the pack, then ramming them all in sequence as they approach you. It took some practice, but in the end I achieved 5 stars using the Reaper without using any power-ups.
Time: Between 1’12” and 1’40” (when I eventually made it, I did so by a big margin!)
Health: between 70 and 79
Felons: 4
The first 15 seconds of this level are crucial. I wait briefly for the other cop to pass on the left, then take the immediate left turn and follow around to the right in order to intercept the felons head on. Having smashed them all (ideally as they’re all cornering, as per Tip #5 above), it’s possible to quickly get ahead and repeat the process on the next bend. At this point you should be able to quickly finish off one or maybe two of them, before going on to chase the rest down. If you’ve learned their route and take some shortcuts, you can take them all out before any of them even cross the bridge.
That said, I think I got pretty lucky on the playthrough in which I eventually achieved 5 stars, and that was after a lot of practice. It would probably help a lot to use a Supercop or two near the start to reduce the need for so much trial and error.
Level 28: Smash away the offensive protest signs
This level is very different to any of the others, and is a lot of fun. In terms of achieving 5 stars, the biggest difference is that you don’t need to get a gold for speed. This is because the difference between a bronze and gold for speed is just 400 points, whereas you get 100 points for every sign you smash. As such, the only real criteria for 5 stars is this:
Smash between 193 and 204 signs.
Naturally, you’ll want to use the Raptor – it’s very hard to even qualify without it. Given the above, the key strategy is to swerve all over the road to take out as many signs as possible, while still making it to the end in time. But also be aware that there’s some street furniture which is easy to mistake for signs, so try not to waste time smashing into that.
Timing of Rams is crucial – it’s tempting to use one to get a jump-start at the beginning, but I found that didn’t work out so well. It’s pretty much essential to use a RAM to help quickly get around the sharp corner towards the end.
It took quite a bit of practice, but in the end I got 5 stars without any power ups. It’s possible that a Supercop or two would make this slightly easier, since they increase your speed.
Unlocking the Guardian
By this point you should have been able to unlock access to the final levels. It’s very hard to get more than one or at most two stars on these without the Guardian – although those stars are still useful of course for helping you edge closer to unlocking it. Level 31 is just fine with the Reaper though, so I’ll cover that as the last part of this section.
Level 31: Destroy as many containers as you can
In the first instance, it’s quite easy to get a few stars out of this level just by avoiding the felons and smashing all the containers you can find. Getting 5 stars is quite tough though, and I used the Reaper and one Supercop to do so.
Time: At least within 1’59”
Health: between 71 and 83
Containers: All 12
What makes this level hard is the three very tough felons, who make it very difficult to finish with sufficient health to get gold. The advantage is that they won’t start to chase you until you go near them. Because of that, I went with a strategy of smashing all the unguarded containers first, then smashing the guarded ones in quick succession to reduce the likelihood of being damaged before getting them all. Unfortunately, one container is placed in a cramped corner where it’s difficult to avoid getting hit – this is where I used the Supercop.
What’s critical therefore is the route that you take. I drew my own crummy little map of every container and felon and planned my route out based on that, and I found this worked pretty well. I’m not about to share that map here, because I’d be embarrassed, and also, I don’t want to take away the fun of making a map from you. I mean, how often do you have to do that in game these days? It’s proper old-school!
Phase 3: The quest for 150 stars
Given the above, you should now have unlocked the Guardian. It should be pretty easy to finish off the remaining levels with at least one star and technically ‘complete’ the game. But of course what you want to do now is get a full 5 stars for every level. This is going to take even more practice and power-ups than the previous levels – but is eminently possible. Here’s how I did it.
Tip #6: Get the rest of the donuts anyway
Even though you don’t need them for anything, I found it really beneficial to hunt down the remaining donut pieces using the Guardian. This turned out to be a great way to get used to its handling, learn a bit about the pathing on the final levels, and practice taking out the felons. As such it provided an achievable-yet-challenging objective that’s not quite as hard as getting the last stars.
Level 29: Stop the three runaway carnival floats
The difficult part here it taking out all three floats quickly enough, as they’re quite fast and wily. I did it using the Guardian, but had to use 5 supercops and 4 instarams to take them out quickly enough while sustaining little damage!
Time: Between 2’01” and 2’04”
Health: 85 was enough
Suspects: All 3
Routing and order is crucial to finish within the gold time. Here’s what worked for me. Start by turning immediately left, then turning into the 3rd parking lane (the one before the end) and ramming the head of the hilarious runaway monster float. Turn straight back on yourself and you should be able to run into the float’s body coming up behind you. Now, you can alternate back and forth between the head and body Ramming, Instaramming, or just driving into each one in turn. If you’re lucky (or very skilled) you can even have them run into each other.
Eventually they’ll manage to slip past (they are wily, after all). At this point, focus on the head – you should be able to eliminate it with a few more rams. If you’ve done this quickly enough, you should now be well placed to intercept the already-weakened body along its route, and take that out with a few more rams.
Finally you just have to hunt down the tail. Remember damage calculation as described above – it’s advantageous once you’ve smashed it to quickly get distance then drive into it again, even without a ram of any kind. This way you should be able to keep it pinned and finish it off pretty quickly.
I practiced the above route quite a bit without using any power ups, until I could do it reliably – but I’d always end up with at most 20 health. I then played it seriously, deploying a bunch of Supercops each time I was attacking a float, and instarams from time to time. I used a total of 5 Supercops and 4 Instarams, and got the five stars right away.
Level 30: Get to the picket line and arrest anyone in your way
This level took me more practice and attempts than any other, and is where I finally needed to figure out the damage calculation (as described above). You can snag 2 stars using the Raptor and just dodging all the cement mixers on your way to the finish, which is pretty fun, but to get the full five stars, you really do have to arrest anyone in your way. Using the Guardian, I was only able to do it with the help of 5 Supercops and 4 Instarams.
Time: Between 2’04” and 2’11”
Health: Between 93 and 74
Suspects: All 5!
Damage control is a huge challenge here: even if you use a Ram, if you’re driving into a cement mixer coming towards you at full speed, you’ll take damage. Because of this, you’ll want to make sure you’re either using a Supercop, or ramming them while they’re stationary or turning a corner.
There’s one other good trick here: the cement trucks are slightly faster than the Guardian, so if you’re driving directly away, they’ll creep up behind you and drive into your rear end, nudging you slightly. This gives you a slight boost in speed and slows them down, so if you spin on the spot and ram them at that moment, they’ll be slow enough that you don’t take any damage.
In terms of route, it’s already defined, so it’s just a matter of where you make your stand. After ramming the first truck, I would turn around to drive into it one more time (not causing a Smash, but dealing some free damage), then using the above damage control techniques to slowly take it down while following the route, and finishing it off before reaching the next set of trucks on the bridge.
On the bridge, after ramming through the blockade (it’s possible to hit both with one ram if you’re lucky), there’s just time to turn around and re-ram, drive past, then turn around and hit them again on your way back along the route.
Similarly when you reach the next two trucks you can ram them, then turn around and hit all four of the trucks now on your tail, then turn around and hit them all again on your return to the normal direction of the route.
From this point it’s a matter of continuing along the route and using the damage control methods to whittle them down – keeping careful count of how many are left (I would count down from 5), as you need to make sure you destroy them all.
Finally, in terms of practice, I tried doing all the above without power-ups until I could make it in within gold time and take out all 5 trucks (while sustaining a huge amount of damage). Then I tried properly, replaying until I successfully took out the first truck without any power ups or taking much damage, then using Supercops and Instarams to help with the remaining four. Even then, I burned through pretty much all the Supercops and Instarams I had accrued by this point re-playing it until I finally got the full five stars. Fortunately, you don’t actually need any more after this. (Unless you count the bonus levels!)
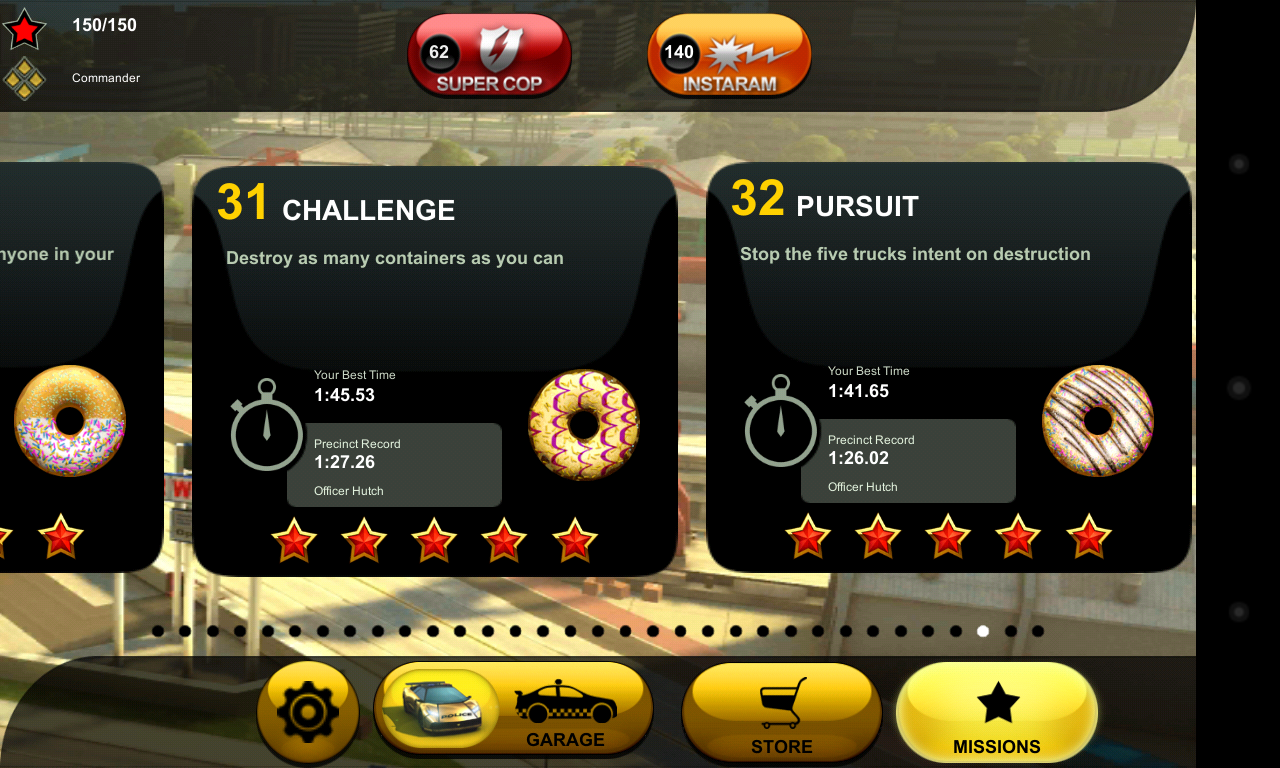
Level 32: Stop the five trucks intent on destruction
The final level looks initially almost impossible. You have to take out 5 garbage trucks, all of which are dropping garbage on the road to damage you and slow you down. Fortunately, with the right route, it’s possible to 5 star this with the Guardian without even using any power ups!
Time: Between 2’03” and 2’20”
Health: Between 77 and 72
Suspects: All 5
Two of the trucks make an immediate right – follow them, ramming the one that’s slightly behind. That one will continue to head off to the right, and you should pursue it and ram it (while the other one splits off) – with a few rams, and charging back into it while it recovers from a ram (as per the damage calculation tip above), you should be able to finish it off quite quickly.
At this point, just following the arrows should allow you to meet the remaining 4 head on and all in a line – a perfect opportunity to ram the first and smash into the others in sequence. Once you become familiar with their route, you can even make sure to do this while they’re cornering and so at their lowest speed, significantly reducing the damage they do to you as you smash into them. You can then take the time to quickly finish one of them off as you did the first.
Once again, if you follow the arrows and get familiar with their route, it’s quite easy to get ahead of the remaining 3 once again all in a line, and as they corner, allowing you to ram and smash them in sequence, and finish one or even two of them off on the spot. From that point it’s quite simple to chase down any left over.
If you’re not done by 2’30”, you may as well start over, since it’s mostly about finding and practicing that initial route. As I mentioned above, if you catch them on the corners, you can do without power-ups entirely, although I imagine using a Supercop at those points would help a lot too.
Well, that’s it! The congratulations message is a little underwhelming, but it’s the achievement that counts.
If you’re on iOS, you could go on to try the next in the series at this point – Smash Bandits.
Bonus Missions
Once you’ve unlocked all the vehicles, 5-starring the bonus missions is pretty easy, with the exception of B2 – “Get to work on time”!
Since it’s all about speed, you’ll naturally want to use the Raptor. However, without using power-ups, my best time was 35.95″ – still a bronze. Using Supercops almost continuously and with instarams used on pretty much every straight, I eventually got gold. Based on my best scoring silver, I can therefore state the gold time is as follows:
Time: Between 31.11″ and 32.34″
So, that’s it. If you have any questions or comments, go ahead and add them below.
-Tim
[Full disclosure: I posted this guide in August 2013. As of January 2014, I have started working for Hutch Games, partly because I loved this game so much. I’m not working on Smash Cops Heat, but I feel I should explicitly state that I’m leaving this post exactly as I originally wrote it.]
